Today was my bulk cooking day.
One of my goals is to minimize the dirty dishes. So I reused my pan for three different dishes:
Kisir,
Mushroom Saute, and
Spaghetti Squash Fajitas!
Turkish cuisine experiments in the USA, experiments with the American cuisine, and her new interest in vegetarian cooking..
Sunday, December 02, 2018
Spaghetti Squash Fajitas
Spaghetti Squash is usually consumed with lots of pasta sauce. This is a lighter and yummy alternative to it.
Ingredients
1 pack fajita seasoning
1 Spaghetti Squash
veggies of your choice (bell peppers, onions, mushrooms..)
olive oil
Directions
First step is to prepare your spaghetti squash. Cut in half length-wise. Put it on a microwave plate cut side down. Add water to the plate until the bottom half is in about half an inch to one inch of water.
Microwave for about 5 minutes (time might change, you might have to microwave shorter or longer). Using a spoon, carve the "spaghetti" and put it all in a separate plate.
Put all your veggies and Spaghetti Squash on a skillet and add the fajita seasoning.
Stir fry for about 15-20 minutes until your veggies are at the desired crunchiness or softness.
Put the mixture back into the squash bowls and top it with beans or meat of your choice!
Afiyet Olsun!
Ingredients
1 pack fajita seasoning
1 Spaghetti Squash
veggies of your choice (bell peppers, onions, mushrooms..)
olive oil
Directions
First step is to prepare your spaghetti squash. Cut in half length-wise. Put it on a microwave plate cut side down. Add water to the plate until the bottom half is in about half an inch to one inch of water.
Microwave for about 5 minutes (time might change, you might have to microwave shorter or longer). Using a spoon, carve the "spaghetti" and put it all in a separate plate.
Put all your veggies and Spaghetti Squash on a skillet and add the fajita seasoning.
Stir fry for about 15-20 minutes until your veggies are at the desired crunchiness or softness.
Put the mixture back into the squash bowls and top it with beans or meat of your choice!
Afiyet Olsun!
Mushroom Saute
Super easy side dish for busy people!
Ingredients
1 container mushroom of your choice
Bell peppers ( I like all different colors, but you can pick the ones you like)
1 table spoon olive oil
1 medium tomato
1 table spoon tomato paste
oregano
salt and pepper and other spices to taste
Directions
Cut your onions and other veggies in big or smaller pieces.
Saute your onions with tomato paste and add all the other veggies.
Cover and simmer for 10 - 20 minutes. Add spices and voila!
Afiyet olsun, enjoy!
Ingredients
1 container mushroom of your choice
Bell peppers ( I like all different colors, but you can pick the ones you like)
1 table spoon olive oil
1 medium tomato
1 table spoon tomato paste
oregano
salt and pepper and other spices to taste
Directions
Cut your onions and other veggies in big or smaller pieces.
Saute your onions with tomato paste and add all the other veggies.
Cover and simmer for 10 - 20 minutes. Add spices and voila!
Afiyet olsun, enjoy!
KISIR / Turkish Bulgur Salad
Kisir is a classic Turkish dish and everyone has a different way of cooking this dish.
The details change, but the main idea is the same. It's super easy and is always a crowd pleaser.
Ingredients
1 medium onion
1 cup fine bulgur
1 cup boiling water
garlic or garlic powder (optional)
1-2 table spoons of olive oil
1-2 table spoons of tomato paste
1 medium tomato
2 mini cucumbers
green onions (optional)
lettuce (optional)
lettuce cups (optional)
salt
1 lemon's juice (about 2 table spoons)
cumin, cayenne pepper, chili pepper, other spices to taste (optional)
Directions
Dice onions (the smaller the better if you have guests, I don't mind seeing my onions) and saute them in olive oil. When they soften a bit add the tomato paste and saute in low for about 10 minutes until they are soft.
While your onions are on low, pour your bulgur in a large rectangular Pyrex dish and put the boiling water on top. Add some salt to taste as well (about one teaspoon). Since we're using fine bulgur, the heat from the boiling water should be enough to cook your bulgur in about 10-15 minutes. You can cover your dish for faster cooking.

I put some green onions too, because I think it fits well with this salad, but they are optional. You can add shredded lettuce to this salad too, which is also optional.
Final step is once your bulgur cools down adding this salad mix to the bulgur and drizzling it with lemon juice. You can top your kisir with some cayenne pepper or chili peppers. Cumin and turmeric a are fitting spices too. I topped mine with cayenne pepper only.
Your Kisir is ready to eat! Afiyet Olsun! Enjoy!
The details change, but the main idea is the same. It's super easy and is always a crowd pleaser.
Ingredients
1 medium onion
1 cup fine bulgur
1 cup boiling water
garlic or garlic powder (optional)
1-2 table spoons of olive oil
1-2 table spoons of tomato paste
1 medium tomato
2 mini cucumbers
green onions (optional)
lettuce (optional)
lettuce cups (optional)
salt
1 lemon's juice (about 2 table spoons)
cumin, cayenne pepper, chili pepper, other spices to taste (optional)
Directions
Dice onions (the smaller the better if you have guests, I don't mind seeing my onions) and saute them in olive oil. When they soften a bit add the tomato paste and saute in low for about 10 minutes until they are soft.
While your onions are on low, pour your bulgur in a large rectangular Pyrex dish and put the boiling water on top. Add some salt to taste as well (about one teaspoon). Since we're using fine bulgur, the heat from the boiling water should be enough to cook your bulgur in about 10-15 minutes. You can cover your dish for faster cooking.
Once your bulgur looks cooked (similar to the picture on the right) add your onions and tomato paste mix and stir well with your bulgur. Now we need to wait for this mixture to cool down because we don't want our salad veggies to get soggy with the heat of bulgur and onion saute.
Next steps are for the salad of Kisir. Dice your veggies as small as you like. I like them small, but there are really no rules except for getting the seed parts out of the tomato. You don't want your salad to be soggy with extra water that would come from the seedy parts of the tomato.

I put some green onions too, because I think it fits well with this salad, but they are optional. You can add shredded lettuce to this salad too, which is also optional.
Final step is once your bulgur cools down adding this salad mix to the bulgur and drizzling it with lemon juice. You can top your kisir with some cayenne pepper or chili peppers. Cumin and turmeric a are fitting spices too. I topped mine with cayenne pepper only.
Your Kisir is ready to eat! Afiyet Olsun! Enjoy!
Thursday, January 04, 2018
A plate full of amazing tastes..
Thanks to Trader Joe's I created 3 side dishes (as seen on the plate below) and they were delicious and easy and fast..
Kale Chips : Find it here
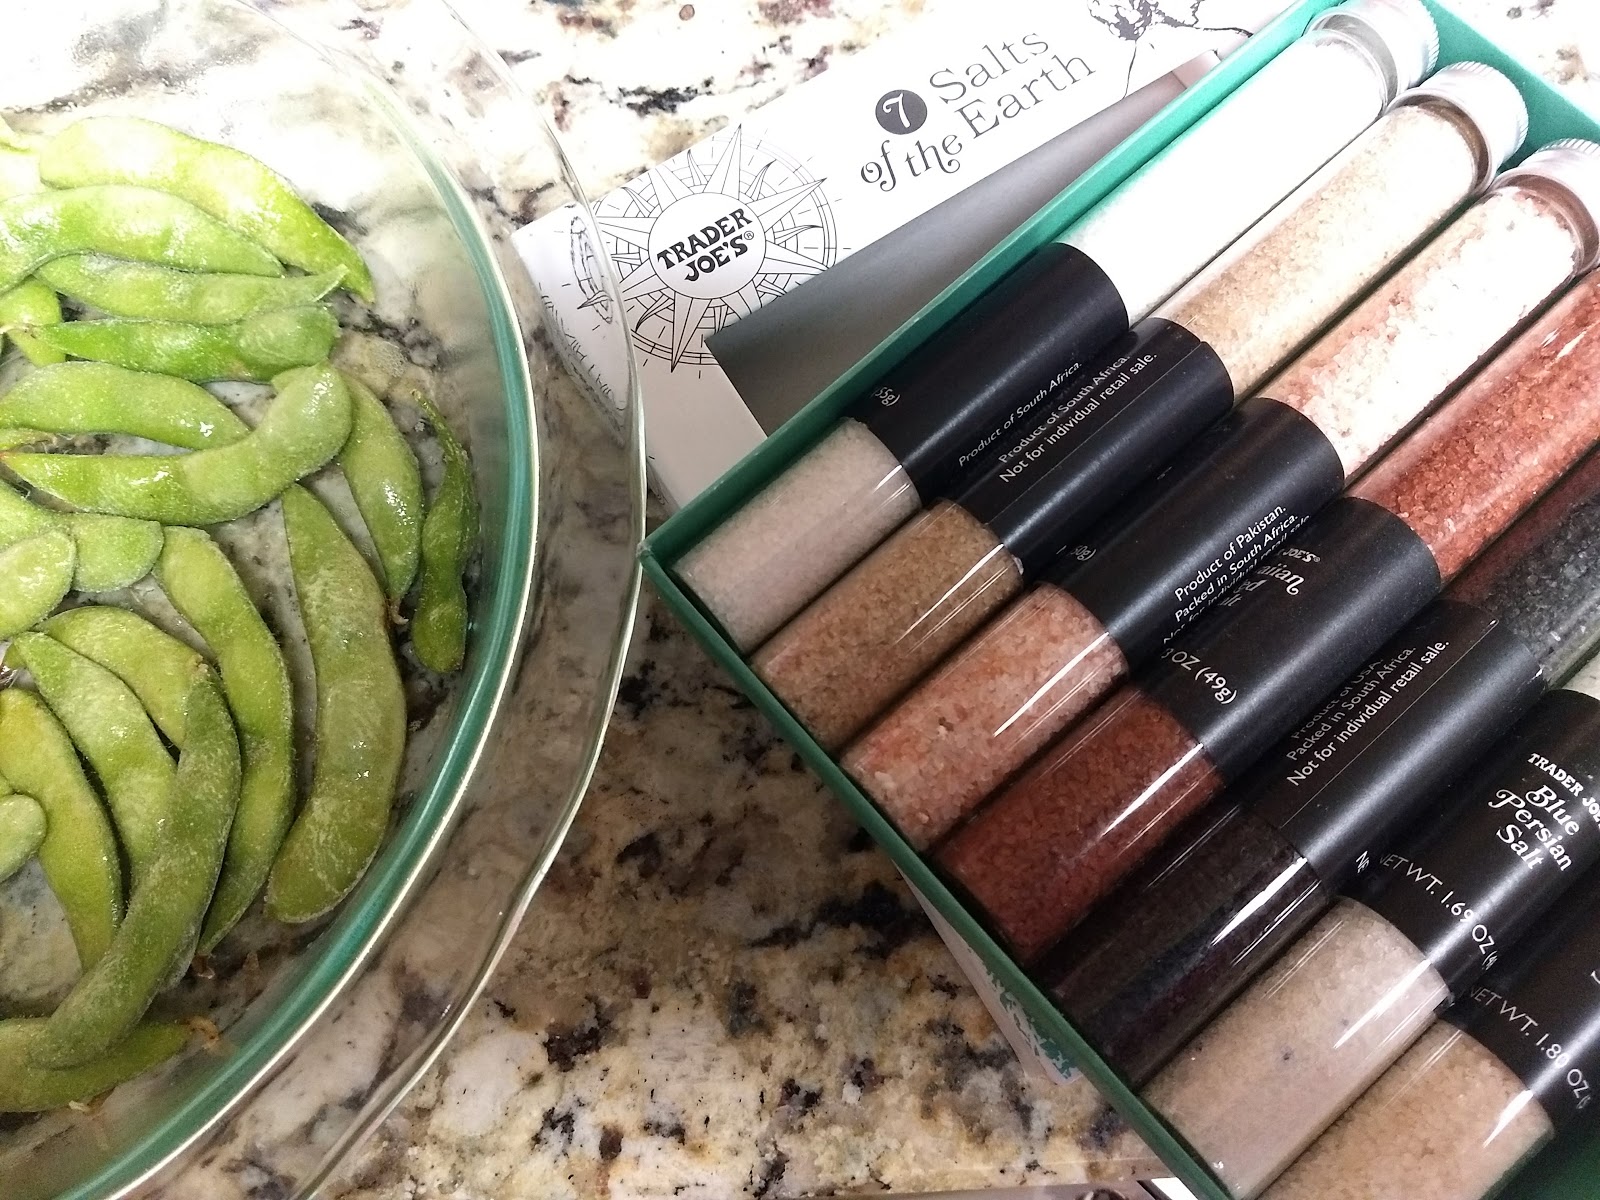
Seven-Salted Edamame : Spray olive oil over frozen, cooked, shelled edamame, sprinkle salts from around the world on top, broil until lightly golden brown on top.
Everything-But-The-Bagel Potatoes : Slice potatoes (thinner slices are better), spray with olive oil, add "Everything-But-The-Bagel" seasoning from Trader Joe's. Bake or broil until lightly brown on top.
Saturday, September 30, 2017
Heirloom tomatoes with marinated mozzarella
I will share a quick and very easy (but delicious) recipe for snacks (or using as an aperitif) that I make.
Ingredients:
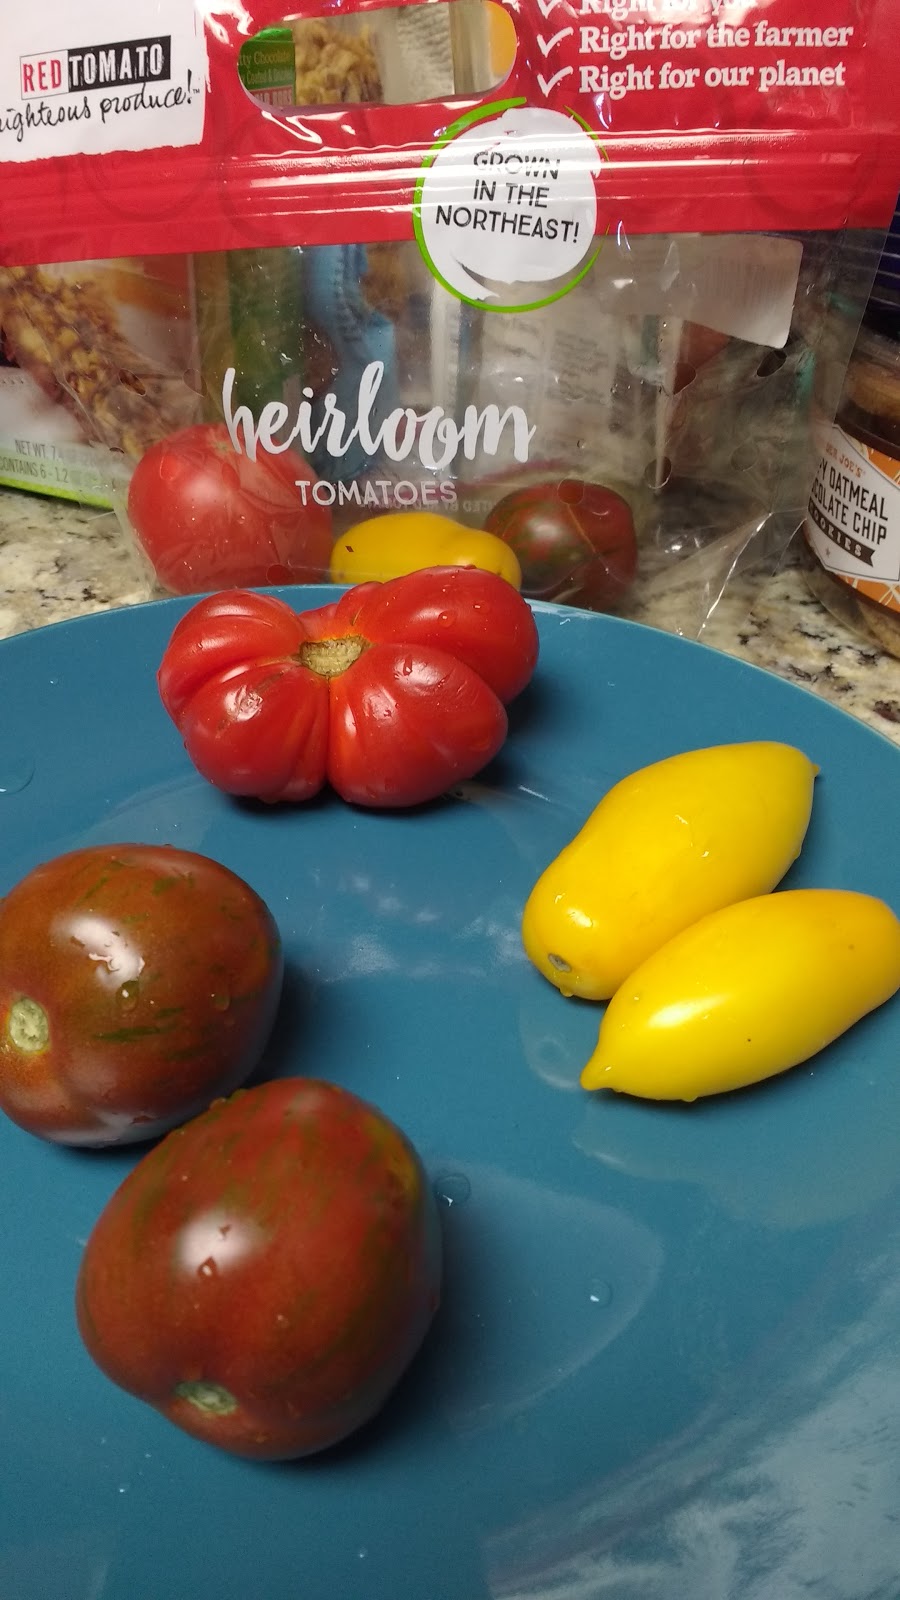
A bag of multicolor heirloom tomatoes
(Marinated) mozzarella cheese
Olive oil seasoning (optional)
Balsamic vinegar (optional)
Balsamic vinegar based salad dressing
Directions:
Cut the tomatoes into small (bite-size) slices
Cut the mozzarella into thin slices, place them on top of your tomatoes
Season the mozzarella and add some dressing as you like.
Afiyet olsun
Ingredients:
A bag of multicolor heirloom tomatoes
(Marinated) mozzarella cheese
Olive oil seasoning (optional)
Balsamic vinegar (optional)
Balsamic vinegar based salad dressing
Directions:
Cut the tomatoes into small (bite-size) slices
Cut the mozzarella into thin slices, place them on top of your tomatoes
Season the mozzarella and add some dressing as you like.
Afiyet olsun
Saturday, July 15, 2017
Vegetarian Chili / Vejeteryan Chili
This week I will expose my husband's super secret vegetarian chili recipe!
It is really awesome and it yields a lot (perfect for summer parties.. most perfect for cold snowy nights too..)!
This recipe takes longer than most of my recipes (about 40 - 60 minutes) but it is worth the effort and time.
Ingredients
1 large onion
1 large red bell pepper
1 large orange or yellow bell pepper
1 large green bell pepper
6 tbl spoons of butter (or olive oil for a healthier version)
1 (and a half) handful carrot sticks
1 tbl spoon chili sauce
1 teaspoon spicy brown mustard
3 cans of beans
5 cans of 15 oz. tomato sauce
1 can corn
1 tbl spoon tomato paste
1 bag (morning star) ground beef (beef-less beef of any kind could be used)
garlic powder
onion powder
smoked paprika (optional)
cayenne pepper (optional)
chili powder (can be used to replace the chili sauce) (optional)
salt
Directions:
Cut and saute the large onion with 3 tablespoons of butter in a skillet until they turn brown in medium heat.
Dice the red, orange (or yellow), and green peppers and saute them with the remaining 3 table spoons of butter in another skillet.
After 10 minutes you start your vegetables, add the tomato sauce and the tomato paste into a deep pot. Add your carrot sticks, beans, beef-less beef, corn, chili sauce and mustard to the tomato sauce.
Combine the peppers and onions in one skillet and let them cook for another 10 minutes.
It is really awesome and it yields a lot (perfect for summer parties.. most perfect for cold snowy nights too..)!
This recipe takes longer than most of my recipes (about 40 - 60 minutes) but it is worth the effort and time.
Ingredients
1 large onion
1 large red bell pepper
1 large orange or yellow bell pepper1 large green bell pepper
6 tbl spoons of butter (or olive oil for a healthier version)
1 (and a half) handful carrot sticks
1 tbl spoon chili sauce
1 teaspoon spicy brown mustard
3 cans of beans
5 cans of 15 oz. tomato sauce
1 can corn
1 tbl spoon tomato paste
1 bag (morning star) ground beef (beef-less beef of any kind could be used)
garlic powder
onion powder
smoked paprika (optional)
cayenne pepper (optional)
chili powder (can be used to replace the chili sauce) (optional)
salt
Directions:
Cut and saute the large onion with 3 tablespoons of butter in a skillet until they turn brown in medium heat.
Dice the red, orange (or yellow), and green peppers and saute them with the remaining 3 table spoons of butter in another skillet.
After 10 minutes you start your vegetables, add the tomato sauce and the tomato paste into a deep pot. Add your carrot sticks, beans, beef-less beef, corn, chili sauce and mustard to the tomato sauce.
Combine the peppers and onions in one skillet and let them cook for another 10 minutes.
Add seasoning (we add a lot of garlic and onion powder a touch of cayenne pepper and salt) to the deep pot and allow them to cook for about 10 minutes.
Add the sauted veggies to the large pot and cook for another 10-15 minutes. Remember to stir your deep pot because you don't want your beans sticking to the bottom.
I like to add more seasoning in the last 5 minutes.
Serve it with sour cream, scoop tortilla chips, shredded Mexican cheese and your choice of salsa.
Afiyet olsun
Monday, July 10, 2017
Super Easy Homemade Kale Chips / Kolay Evyapimi Kara Lahana Cipsleri
This is the super easy and ad-hoc way that I came up with for making kale chips at home.
I have read on various sites how people make their own chips at home and theirs look quite professional with attention to detail, mine is a more "busy-mom" way..
The recipe can be improved in the ways that I will list, but this simple, least-possible-effort way that I used also worked perfectly.
Ingredients:
Directions:
Wash the kale and cut it into smaller pieces with hand, almost in the shape and size of potato chips.
Try to dry the dry the pieces as much as you can ( I left them in the strainer for a few minutes and shake them well, but recommended way would be use a paper towel to pat them (almost) dry).
Transfer the kale pieces to a bowl and add the olive oil and seasoning.
Stir to make sure all pieces are oiled and seasoned.
Cover the bottom of your trays with aluminum foil.
Transfer the kale pieces separately on to the aluminum foil.
Turn on the oven in the broil-high setting.
Bake for 10-15 minutes until they look brownish on top.
Enjoy immediately, they are not as good when kept over night.
I didn't add any salt or herbs in addition to Trader Joe's seasoning. It turned out amazing!.
Afiyet Olsun! Enjoy!
PS:
As mentioned above this recipe can be improved. Here are some ways I thought would help better chips:
- dry your kale throughly using paper towel
- use cooking spray to oil your chips
- use the seasoning separately on each piece instead of putting the oil and seasoning in the bowl
I have read on various sites how people make their own chips at home and theirs look quite professional with attention to detail, mine is a more "busy-mom" way..
The recipe can be improved in the ways that I will list, but this simple, least-possible-effort way that I used also worked perfectly.
Ingredients:
- Bunch kale (I used a version called farmers market bunch, I assume it's for cooking, it's not baby kale, I thought the thicker the better for chips)
- Chile-lime seasoning from Trader Joe's (as desired)
- Olive oil (3 table spoons) ( I used olive+grape seed oil)
- Aluminum foil
Directions:
Wash the kale and cut it into smaller pieces with hand, almost in the shape and size of potato chips.
Try to dry the dry the pieces as much as you can ( I left them in the strainer for a few minutes and shake them well, but recommended way would be use a paper towel to pat them (almost) dry).
Transfer the kale pieces to a bowl and add the olive oil and seasoning.
Stir to make sure all pieces are oiled and seasoned.
Cover the bottom of your trays with aluminum foil.
Transfer the kale pieces separately on to the aluminum foil.
Turn on the oven in the broil-high setting.
Bake for 10-15 minutes until they look brownish on top.
Enjoy immediately, they are not as good when kept over night.
I didn't add any salt or herbs in addition to Trader Joe's seasoning. It turned out amazing!.
Afiyet Olsun! Enjoy!
PS:
As mentioned above this recipe can be improved. Here are some ways I thought would help better chips:
- dry your kale throughly using paper towel
- use cooking spray to oil your chips
- use the seasoning separately on each piece instead of putting the oil and seasoning in the bowl
Friday, December 09, 2011
Cranberry Sauce/ TurnayemiÅŸi Sosu
I made my very first cranberry sauce at home and I take pride in my work.
It is so delicious and took me 15 min.s !! So easy!
Here we go:
Ingredients:
whole cranberries (24 ounces, I used 2 bags)
2 cups white sugar (for 1 bag use 1 cup)
2 cups of orange juice (for 1 bag use 1 cup)
Directions:
In a large saucepan dissolve the sugar in the orange juice.
Once the sugar is dissolved add the cranberries and boil them all (over medium heat!) until the cranberries start to pop.
I covered the pan because cranberries do pop and I didn't want pink stains on the counter.
After boiling for 15 min.s it was ready. Note that 15 min.s makes is for a jelly-like cranberry sauce, if you want it a bit more runny try boiling for 10 min.s.
It is so delicious and took me 15 min.s !! So easy!
Here we go:
Ingredients:
whole cranberries (24 ounces, I used 2 bags)
2 cups white sugar (for 1 bag use 1 cup)
2 cups of orange juice (for 1 bag use 1 cup)
Directions:
In a large saucepan dissolve the sugar in the orange juice.
Once the sugar is dissolved add the cranberries and boil them all (over medium heat!) until the cranberries start to pop.
I covered the pan because cranberries do pop and I didn't want pink stains on the counter.
After boiling for 15 min.s it was ready. Note that 15 min.s makes is for a jelly-like cranberry sauce, if you want it a bit more runny try boiling for 10 min.s.
Afiyet olsun.
Sunday, May 22, 2011
Homemade unleavened bread/ Mayasiz Ekmek
I tried a very easy and delicious recipe this morning.
I found it here: http://www.best-bread-recipes.com/recipe-unleavened-bread.html
and tried the first one. Here's the outcome:
I found it here: http://www.best-bread-recipes.com/recipe-unleavened-bread.html
and tried the first one. Here's the outcome:
It certainly tastes yummy. Afiyet olsun.
------------------------------
Mayasiz Ekmek
Yapimi cok kolay ve lezzeti pek yerinde olmustur.
Tarifi soyle:
Malzemeler:
3 kahve fincani dolu dolu un
2 corba kasigi sivi ya da kati yag (ben zeytinyagi koydum, pek basarili oldu)
3 yumurta
3/4 kahve fincani su ya da sut
1 tatli kasigi (silme) tuz
Yapilisi:
Once unu ve tuzu karistirin, yumurtalari ayri bir kapta 2-3 dakika cirpin.
Tarifi soyle:
Malzemeler:
3 kahve fincani dolu dolu un
2 corba kasigi sivi ya da kati yag (ben zeytinyagi koydum, pek basarili oldu)
3 yumurta
3/4 kahve fincani su ya da sut
1 tatli kasigi (silme) tuz
Yapilisi:
Once unu ve tuzu karistirin, yumurtalari ayri bir kapta 2-3 dakika cirpin.
Sonra unu ve yumurtalari su/sut ile karistirip yine 2-3 dakika (ve topaklari gidene kadar ) karistirin.
Hafif yogun bir kek hamuru gibi olmasi lazim.
Altini yagladiginiz kucuk kare bir tepsiye koyun.
Tercihen onceden isitilmis 220-225 (450 f) firinda ustu pembelesinceye kadar pisirin. (20 dk kadar)
Afiyet olsun.
Hafif yogun bir kek hamuru gibi olmasi lazim.
Altini yagladiginiz kucuk kare bir tepsiye koyun.
Tercihen onceden isitilmis 220-225 (450 f) firinda ustu pembelesinceye kadar pisirin. (20 dk kadar)
Afiyet olsun.
Tuesday, November 10, 2009
Avocado Salad with Black Beans/ Fasulyeli Avokado Salatasi
I made up this delish recipe tonight and it is healthy too...
Ingredients (1-2 servings )
1 small avocado
1/2 onions (red onions might look cuter :) )
1/2 lemon
1/2 can black beans
salt
oregano leaves
olive oil
Directions
Cut your avocado into medium size cubes. (if you don't know how to cut an avocado, follow this link: http://www.youtube.com/watch?v=PAAMx_R523o)
Immediately after cutting your avocado, put your half lemon's juice on it to avoid browning.
Then, cut your onions as you wish and then add it on the avocados.
The last step is opening your can of black beans and rinse them. Use half of the can for the salad.
Add oregano leaves, salt and olive oil to season your salad.
Mix them all well together.. You may add corn and/or cheese of your choice for different tastes. And your salad is ready to eat..
Afiyet olsun :)
Ingredients (1-2 servings )
1 small avocado
1/2 onions (red onions might look cuter :) )
1/2 lemon
1/2 can black beans
salt
oregano leaves
olive oil
Directions
Cut your avocado into medium size cubes. (if you don't know how to cut an avocado, follow this link: http://www.youtube.com/watch?v=PAAMx_R523o)
Immediately after cutting your avocado, put your half lemon's juice on it to avoid browning.
Then, cut your onions as you wish and then add it on the avocados.
The last step is opening your can of black beans and rinse them. Use half of the can for the salad.
Add oregano leaves, salt and olive oil to season your salad.
Mix them all well together.. You may add corn and/or cheese of your choice for different tastes. And your salad is ready to eat..
Afiyet olsun :)
Monday, October 19, 2009
Home Made Yogurt / Ev Yapimi Yogurt
Making your yogurt at home is easier than it sounds! I remember my mom making yogurt when I was a kid but I never thought I could do it here in the states. Thanks to Ozgun for her encouraging directions and efforts :).
I was lucky and my first attempt was a great success! But it might take a few tries before you know how many hours you need, how hot your milk should feel, etc. I say be patient and don't discourage yourselves! Here's how I did it by using my mom's directions as a template:
Ingredients
1/2 gallon milk (~2lt.s) (I have used fat-free organic Trader Joe's milk
for my first attempt, %2 fat Kroger's Milk for my second attempt! Both work just fine!)
10 table spoons of yogurt (~12 OZ = 350 gr.s) ( I've used low-fat organic Trader Joe's yogurt for my first attempt and Dannon nonfat yogurt for the second one. Both work just fine!)
(I tried fat-free options just to see if they work. And they do :) I think it is good to choose either your milk or your yogurt low-fat, and then use the regular or fat-free options for the other one. Or you can go with regular for both milk and yogurt.. I think having milk fat in at least one item is a good thing when we are talking about yogurt! Personally, I liked it better when everything was organic. Just because it feels more organic :) But, taste wise, it works just the same with Kroger milk..)
Directions
Pour your milk into a pot that is thick at the bottom. (Thanks to Charlie for the advise! I chose the wrong type of pot for my first attempt and ended up burned milk at the bottom of my pot! Even though the yogurt was still delicious, you don't want your milk burn! )
Boil your milk and leave it on the stove to cool down a little. If you have a kitchen thermometer, you can use it to see the right temperature. (The perfect temp. for fermentation is between 45C-25C (113 F - 77F) degrees.)
If you don't have a thermometer, the best way to understand the right temperature is using your pinky! You should be able to stir the milk with your pinky. The milk should be hot enough to make you feel uncomfortable but not too hot that you can't keep your finger in.
While you are waiting for your milk to get to the right temperature, take your yogurt out of the fridge so that it won't be too cold. After you see that your milk is at the right temperature, take about 1 cup out of it to mix with your yogurt that has been sitting aside. The reason we are doing this is because we don't want our yogurt and milk have a huge difference in temperature! ..which is an important detail!.
At this step you mix your 10 table spoons of yogurt with your cup of milk with the rest of your milk that is in the right temperature. You can either
a).. mix them all in your pot and put the mixture into another pot for fermentation.
or (for your storage purposes )
b) .. pour your milk into container(s) of your choice and if you are using more than one container share out your yogurt-milk mixture accordingly. (I used my old yogurt containers for this trial. Each container takes around 800ml.s of milk and I mixed it with 5 table spoons of yogurt. But first I used 1/2 cup of milk to make sure my yogurt's temperature is not too low.)
As soon as you mix your yogurt with your milk, you put the containers somewhere warm and wrap them with blankets to keep it warm for the next 4-5 hours. I put them right next to my central heating unit and use 2 blankets to keep them warm! Then put a pillow on top to seal the deal and keep the sides of my blanket together. :) Here's how I did it:
After you wrap your containers tightly, leave them in that warm place of yours for 4 to 5 hours. The place I leave them is usually around 80-100F degrees. So I keep them wrapped for 4 hours. ( The yogurt will get tangy if you keep them wrapped for too long!)
In 4-5 hours unwrap your yogurt but don't move it immediately. Let it cool for 20 min.s or so. After that 20 min.s put it on the kitchen counter or somewhere cooler than the place you left them for fermenting. As your yogurt containers feel like they are at the room temperature, put them in the fridge. Keep it in the fridge for at least 3-5 hours before serving.
I was lucky and my first attempt was a great success! But it might take a few tries before you know how many hours you need, how hot your milk should feel, etc. I say be patient and don't discourage yourselves! Here's how I did it by using my mom's directions as a template:
Ingredients
1/2 gallon milk (~2lt.s) (I have used fat-free organic Trader Joe's milk
for my first attempt, %2 fat Kroger's Milk for my second attempt! Both work just fine!)
10 table spoons of yogurt (~12 OZ = 350 gr.s) ( I've used low-fat organic Trader Joe's yogurt for my first attempt and Dannon nonfat yogurt for the second one. Both work just fine!)
(I tried fat-free options just to see if they work. And they do :) I think it is good to choose either your milk or your yogurt low-fat, and then use the regular or fat-free options for the other one. Or you can go with regular for both milk and yogurt.. I think having milk fat in at least one item is a good thing when we are talking about yogurt! Personally, I liked it better when everything was organic. Just because it feels more organic :) But, taste wise, it works just the same with Kroger milk..)
Directions
Pour your milk into a pot that is thick at the bottom. (Thanks to Charlie for the advise! I chose the wrong type of pot for my first attempt and ended up burned milk at the bottom of my pot! Even though the yogurt was still delicious, you don't want your milk burn! )
Boil your milk and leave it on the stove to cool down a little. If you have a kitchen thermometer, you can use it to see the right temperature. (The perfect temp. for fermentation is between 45C-25C (113 F - 77F) degrees.)
If you don't have a thermometer, the best way to understand the right temperature is using your pinky! You should be able to stir the milk with your pinky. The milk should be hot enough to make you feel uncomfortable but not too hot that you can't keep your finger in.
While you are waiting for your milk to get to the right temperature, take your yogurt out of the fridge so that it won't be too cold. After you see that your milk is at the right temperature, take about 1 cup out of it to mix with your yogurt that has been sitting aside. The reason we are doing this is because we don't want our yogurt and milk have a huge difference in temperature! ..which is an important detail!.
At this step you mix your 10 table spoons of yogurt with your cup of milk with the rest of your milk that is in the right temperature. You can either
a).. mix them all in your pot and put the mixture into another pot for fermentation.
or (for your storage purposes )
b) .. pour your milk into container(s) of your choice and if you are using more than one container share out your yogurt-milk mixture accordingly. (I used my old yogurt containers for this trial. Each container takes around 800ml.s of milk and I mixed it with 5 table spoons of yogurt. But first I used 1/2 cup of milk to make sure my yogurt's temperature is not too low.)
As soon as you mix your yogurt with your milk, you put the containers somewhere warm and wrap them with blankets to keep it warm for the next 4-5 hours. I put them right next to my central heating unit and use 2 blankets to keep them warm! Then put a pillow on top to seal the deal and keep the sides of my blanket together. :) Here's how I did it:
In 4-5 hours unwrap your yogurt but don't move it immediately. Let it cool for 20 min.s or so. After that 20 min.s put it on the kitchen counter or somewhere cooler than the place you left them for fermenting. As your yogurt containers feel like they are at the room temperature, put them in the fridge. Keep it in the fridge for at least 3-5 hours before serving.
Afiyet Olsun :)
Sunday, October 11, 2009
My first homemade yogurt.../ Ilk ev yapimi yogurdum.. :)
Friday, October 09, 2009
Variations with peas and carrots.../Bezelye ve Havuc Uzerine Cesitlemeler..
As a working woman, I don't feel like cooking all the time! Frozen peas and carrots, and bell peppers come to rescue me and my diet at those times!
Here are a few variations I made up. You can add/remove / modify the recipes as you wish..
Basic Peas and Carrots
Ingredients
1/2 - 1 onion
2 -3 cups of frozen peas and carrots
olive oil
black pepper
paprika
garlic/garlic powder
oregano leaves
tomato sauce/paste (if you will use tomato paste then you'll need a cup of water)
salt
Directions
Begin with the onions. You may cut, chop or dice your onions. I don't cut them finely but everybody has a different taste..
Put your olive oil in a pot and let your onions brown a little. (If you are using real garlic, you may as well mince it and add it at this point.)
Add your tomato paste at this point if you are using tomato paste. If you will use tomato sauce, wait until you add your peas and carrots and spices. You may add half a cup of water with your tomato paste so that it wouldn't burn.
Then add your peas and carrots. I like washing them in vinegar and then rinse them with water before I add them. This gives them a little hint of the vinegar.
After you add your peas and carrots add your spices. For a spicier dish, you may use crushed red peppers. If you are using tomato sauce this is the time to pour 2-3 cups of tomato sauce and let everything come to a boil. After it comes to a boil, let it cook for 10 - 15 min.s more and your dish will be ready to eat. Afiyet olsun :)
Peas and Carrots with Potatoes
Ingredients
Ingredients for basic peas and carrots
+
1 small potato
1 cup of water
Directions
Begin with your potato. Cut your potato into small cubes and let it sit aside for a few min.s 'till you cut the onions. You may cut, chop or dice your onions. I don't cut them finely but everybody has a different taste.. Put your olive oil in a pot and let your onions brown a little. (If you are using real garlic, you may as well mince it and add it at this point.)
Add your tomato paste at this point if you are using tomato paste. If you will use tomato sauce, wait until you add your peas and carrots and spices. You may add half a cup of water with the tomato paste so that it wouldn't burn. Add your potatoes and a cup of water and let the potatoes cook for 15 min.s or so until they are soft enough to eat. Then add your peas and carrots.
After you add your peas and carrots add your spices. For a spicier dish, you may use crushed red peppers. If you are using tomato sauce this is the time to pour 2-3 cups of tomato sauce and let everything come to a boil. After it comes to a boil, let it cook for 10 min.s more and your dish will be ready to eat. Afiyet olsun :)
Peas and Carrots with Bell Peppers
Ingredients
Ingredients for basic peas and carrots
+
1 cup of red, green, yellow, orange bell pepper stripes
(I use Trader Joe's frozen bell pepper stripes!)
Directions
Begin with cutting the onions. You may cut, chop or dice your onions. I don't cut them finely but everybody has a different taste.. Put your olive oil in a pot and let your onions brown a little. (If you are using real garlic, you may as well mince it and add it at this point.)
Add your tomato paste at this point if you are using tomato paste. If you will use tomato sauce, wait until you add your peas and carrots and spices. You may add half a cup of water with the tomato paste so that it wouldn't burn.
After you add your peas and carrots, your bell peppers, and add your spices. For a spicier dish, you may use crushed red peppers. If you are using tomato sauce this is the time to pour 2-3 cups of tomato sauce and let everything come to a boil.
After it comes to a boil, let it cook for 10 -15 min.s more and your dish will be ready to eat. Afiyet olsun :)
Another variation is using beans instead of peas and carrots! The directions are the same, just use canned kidney beans instead of peas.. (and carrots..) Here is how it looks with beans:
Afiyet olsun :)
Here are a few variations I made up. You can add/remove / modify the recipes as you wish..
Basic Peas and Carrots
Ingredients
1/2 - 1 onion
2 -3 cups of frozen peas and carrots
olive oil
black pepper
paprika
garlic/garlic powder
oregano leaves
tomato sauce/paste (if you will use tomato paste then you'll need a cup of water)
salt
Directions
Begin with the onions. You may cut, chop or dice your onions. I don't cut them finely but everybody has a different taste..
Add your tomato paste at this point if you are using tomato paste. If you will use tomato sauce, wait until you add your peas and carrots and spices. You may add half a cup of water with your tomato paste so that it wouldn't burn.
Then add your peas and carrots. I like washing them in vinegar and then rinse them with water before I add them. This gives them a little hint of the vinegar.
After you add your peas and carrots add your spices. For a spicier dish, you may use crushed red peppers. If you are using tomato sauce this is the time to pour 2-3 cups of tomato sauce and let everything come to a boil. After it comes to a boil, let it cook for 10 - 15 min.s more and your dish will be ready to eat. Afiyet olsun :)
Ingredients
Ingredients for basic peas and carrots
+
1 small potato
1 cup of water
Directions
Begin with your potato. Cut your potato into small cubes and let it sit aside for a few min.s 'till you cut the onions. You may cut, chop or dice your onions. I don't cut them finely but everybody has a different taste.. Put your olive oil in a pot and let your onions brown a little. (If you are using real garlic, you may as well mince it and add it at this point.)
Add your tomato paste at this point if you are using tomato paste. If you will use tomato sauce, wait until you add your peas and carrots and spices. You may add half a cup of water with the tomato paste so that it wouldn't burn. Add your potatoes and a cup of water and let the potatoes cook for 15 min.s or so until they are soft enough to eat. Then add your peas and carrots.
After you add your peas and carrots add your spices. For a spicier dish, you may use crushed red peppers. If you are using tomato sauce this is the time to pour 2-3 cups of tomato sauce and let everything come to a boil. After it comes to a boil, let it cook for 10 min.s more and your dish will be ready to eat. Afiyet olsun :)
Peas and Carrots with Bell Peppers
Ingredients
Ingredients for basic peas and carrots
+
1 cup of red, green, yellow, orange bell pepper stripes
(I use Trader Joe's frozen bell pepper stripes!)
Directions
Begin with cutting the onions. You may cut, chop or dice your onions. I don't cut them finely but everybody has a different taste.. Put your olive oil in a pot and let your onions brown a little. (If you are using real garlic, you may as well mince it and add it at this point.)
Add your tomato paste at this point if you are using tomato paste. If you will use tomato sauce, wait until you add your peas and carrots and spices. You may add half a cup of water with the tomato paste so that it wouldn't burn.
After you add your peas and carrots, your bell peppers, and add your spices. For a spicier dish, you may use crushed red peppers. If you are using tomato sauce this is the time to pour 2-3 cups of tomato sauce and let everything come to a boil.
Another variation is using beans instead of peas and carrots! The directions are the same, just use canned kidney beans instead of peas.. (and carrots..) Here is how it looks with beans:
Subscribe to:
Posts (Atom)